Step 1 - Render the car and headlights
In this step of the tutorial you create the render passes you need to render the car and the headlights separately.
Assets for the tutorial
The starting point of this tutorial is the Bloom.kzproj Kanzi Studio project file stored in the <KanziWorkspace>/Tutorials/Bloom/Start directory.
The assets you use in this tutorial are stored in the <KanziWorkspace>/Tutorials/Bloom/Assets directory.
The <KanziWorkspace>/Tutorials/Bloom/Completed directory contains the completed Kanzi Studio project of this tutorial.
Render the scene
In this section you create the render passes to render the entire scene.
To render the scene:
- In Kanzi Studio open the project stored in the <KanziWorkspace>/Tutorials/Bloom/Start directory.
-
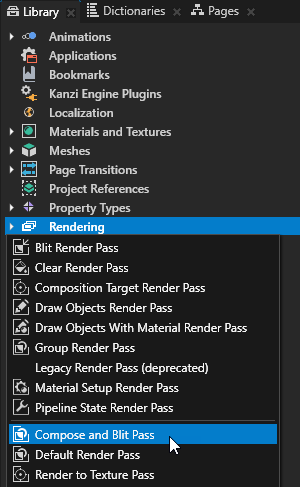
In the Library press Alt and right-click Rendering, and select Compose and Blit Pass.
Compose and Blit Pass template contains the render pass structure that enables you to blit to the screen Composition Target Render Pass render passes or textures using a specific material. The template contains these render passes:- Composition Target Render Pass renders itself and its child render passes to a composition target.
- Clear Render Pass clears some or all of the buffers of the current render context. By default the Clear Render Pass in the Compose and Blit Pass template clears the color buffer with transparent black color and the depth buffer with value 1.
For example, to clear the color buffer with a different color, set the Clear Color property to the color that you want to use as the background color of the content that Kanzi renders to the Composition Target Render Pass. - Draw Objects Render Pass allows you to set a Camera node to render a specific object source and to control frustum culling. By default the Draw Objects Render Pass uses the default Camera node to render all nodes in a Scene node.
- Blit Render Pass blits one or more render passes or textures on the screen using a specific material. By default this Blit Render Pass draws on the screen the content rendered by the Composition Target Render Pass.

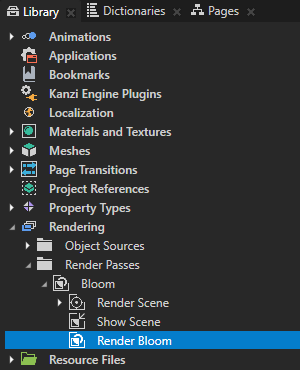
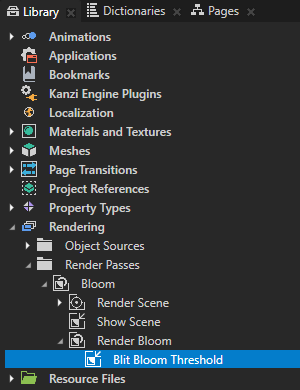
- In the Library > Rendering > Render Passes select the Compose and Blit Pass render pass, press F2, and rename it to Bloom.
You use this render pass to gather several render passes you create in this procedure which, when combined, render the car and apply the bloom effect to the headlights.
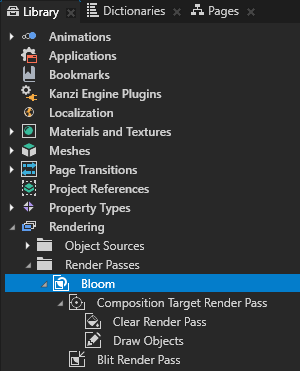
- In the Library > Rendering > Render Passes > Bloom render pass rename:
- Composition Target Render Pass to Render Scene
Composition Target Render Pass renders itself and its child render passes to a composition target. You use this render pass to render the Scene node car to a composition target, which you later use as input for the render pass to pick only the headlights. - Blit Render Pass to Show Scene
Blit Render Pass blits one or more render passes or textures on the screen using a specific material. You use this render pass to draw on the screen the Render Scene render pass which renders the content of the Scene node car.
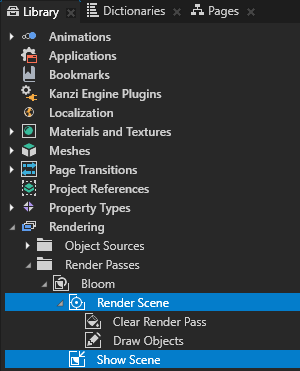
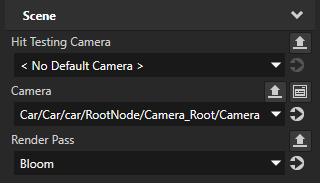
- In the Project select the RootPage > Car > car node and in the Properties set the Render Pass property to Bloom.
Kanzi Studio renders the Scene node car using the Bloom render pass.
Render the headlights
In this section you create the render passes and material you need to render only the car headlights to which you later apply the bloom effect.
To render the headlights:
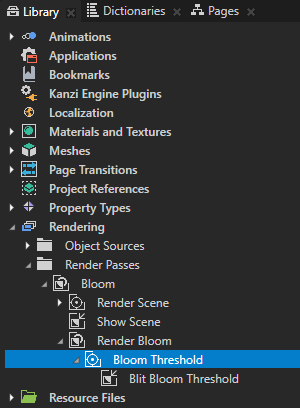
- In the Library > Rendering > Render Passes > Bloom create a Group Render Pass and name it Render Bloom.
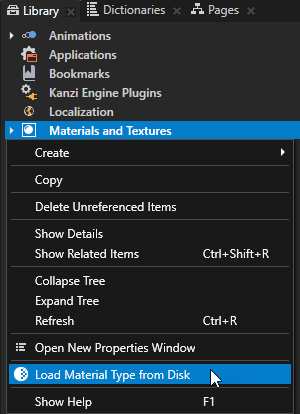
- In the Library right-click Materials and Textures, select Load Material Type From Disk, go to <KanziWorkspace>/Tutorials/Bloom/Assets, and load the BloomThreshold.kzmat material type.
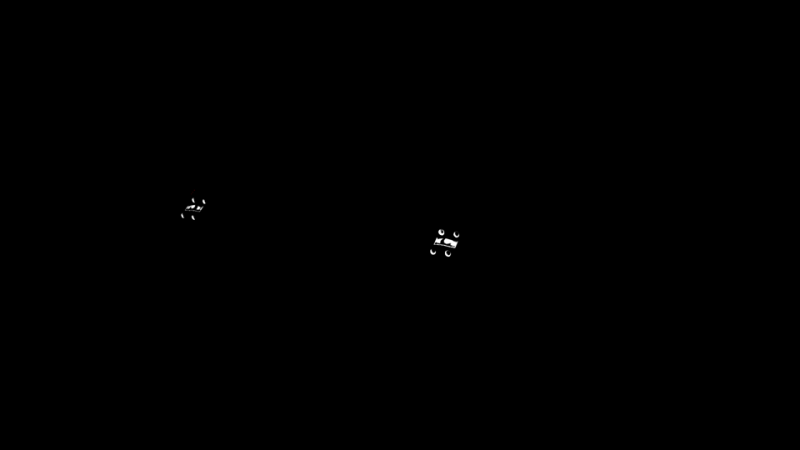
Kanzi Studio adds the BloomThreshold material type and creates the BloomThresholdMaterial material which supports rendering only the regions which are brighter than a specific threshold value.
The fragment shader of the BloomThreshold material type:- Maps the color values less than or equal to a threshold value to 0.
- Maps the color values greater than a threshold value to a cubic equation approaching 1 when the color value approaches 1.

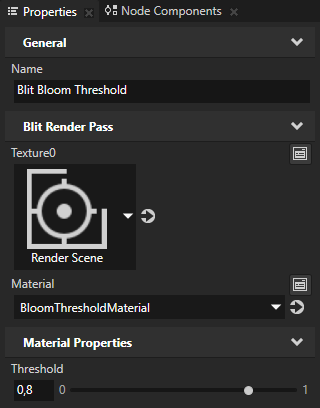
- In the Library > Rendering > Render Passes > Bloom > Render Bloom create a Blit Render Pass, name it Blit Bloom Threshold, and in the Properties add and set:
- Texture0 to Render Scene
- Material to BloomThresholdMaterial
- Threshold to 0,8
You use this render pass to draw to the screen only those regions of the car node that are brighter than the value of the Threshold property. Later you apply a Gaussian blur to these regions to create the bloom effect.
- In the Library > Rendering > Render Passes > Bloom > Render Bloom create a Composition Target Render Pass, name it Bloom Threshold, and drag the Blit Bloom Threshold render pass to the Bloom Threshold render pass.
You use the Bloom Threshold render pass to render the Blit Bloom Threshold render pass to a composition target which you later use as input to the render passes that apply the bloom effect. Because Kanzi renders the Blit Bloom Threshold render pass to a composition target, the Preview does not show it.
< INTRODUCTION
NEXT STEP >
See also
To learn more about the render passes in Kanzi, see Rendering.
To learn more about materials and material types, see Material types and materials.

Open topic with navigation